The database management is the part of the Meeting Manager where CoCon allows you to manage the delegate database that contains all delegates, groups, etc. The central database contains all data and this database connects to the CoCon Room Server.
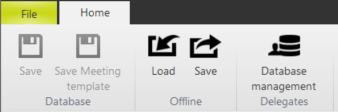
To access the Database Management click the button in the Delegates section of the ribbon.
When you open the Database management you see the screen below with the following functionality:
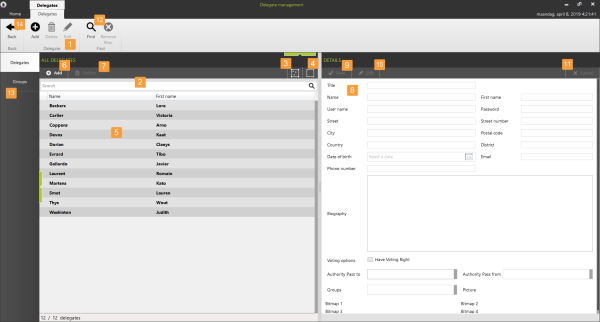
Click the Add button to add a new delegate: this creates an empty delegate. Complete the delegate details in the section on the right of the screen. You can also add delegates by pressing CTRL+N on the keyboard.
Click Delete to remove one or more delegates from the database
To access the import and export functionality of the Delegate database, click the Home tab. Three options are available:
This function allows you to select a delegate file from the Televic Conference TMS-software and import the delegates contained into the current CoCon database format. The extension of this type of file is .del, but it is actually just a renaming of a .mdb file (MS Access 2003 database). This can also be used to import delegates and groups for users who have a database in a different format.
You can find an example of the expected format of the MS Access database in a sample database located under C:\Program Files (x86)\Televic Conference\CoCon\MeetingManager\TMSImporter\Sample\Sample_100_Delegates.mdb and Sample_100_Delegates.del (or similar for your installation). Be mindful of the following items:
This button allows you to import delegates from a local file to the central database. Currently, only a proprietary XML-format is defined as file format for importing and exporting delegates. This data format is used when exporting.
Using this button, you can export the delegates and groups contained in the database to a local file, which you can later import again (using the button described above).
With the Plixus engine it is possible to use RFID badges. CoCon is compatible with RFID badges with 4Byte NUID (like MiFare classic and MiFare Plus) and 7Byte NUID.
When using RFID badges, no actual data is written on the badge. Instead, the Unique Identifier of the badge is read and stored in the database. This means that existing RFID applications can still use the entire data contents of the card.
In that case, the “Badge Writer” section of the Delegates-ribbon looks like the following figure:
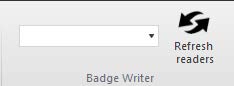
Figure 1-13 RFID badge writer buttons for RFID badge reader
Connect the USB-RFID reader to the PCrunning the Meeting Manager, and click Refresh readers . At that point, you should be able to see and select the reader in the dropdown menu. Now the following actions are available:
With these actions, you can perform the following functions:
1. Put a badge on the RFID reader
2. The selection of the list with all delegates is removed
3. You can enter the data of the new delegate in the panel on the right.
4. Click Save when ready. Now a new delegate is created with the badge that was put on the RFID reader.
1. Put the badge of the delegate on the RFID reader
2. Now the delegate is selected in the list with all delegates.
1. Select the delegate in the list with all delegates
2. Click on the Edit button in the Delegate section of the ribbon, or in the Details-section.
3. Put the badge on the RFID reader. Now the Unique ID is filled in the “Badge number” field of the delegate.
4. Click Save. Now the delegate is associated with the RFID badge.
1. Put the RFID badge on the RFID reader. The delegate is automatically selected in the list.
2. Click on the Edit button in the Delegate-section or the ribbon, or in the Details-section.
3. Remove the badge from the RFID reader. The “Badge number” field of the delegate is cleared.
4. Click Save. Now the delegate is no longer associated with the RIFD badge.
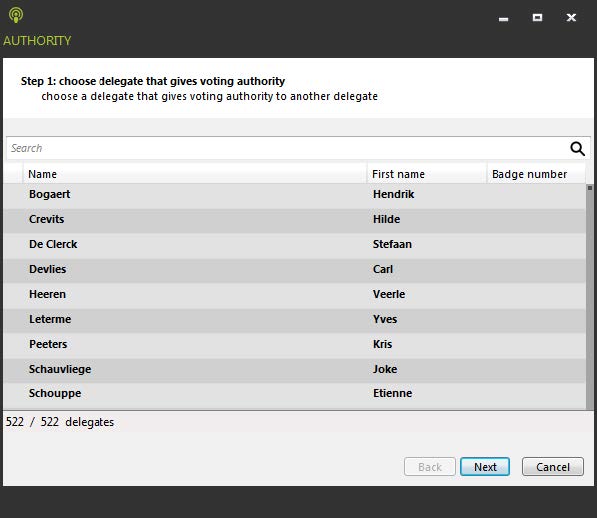
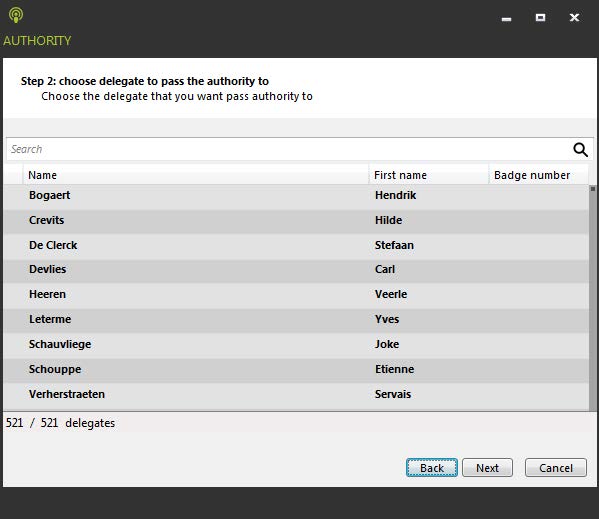
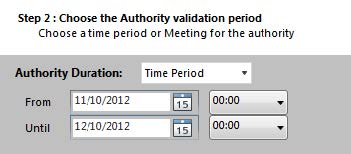
This part of the Delegate Management-ribbon allows you to create authority passes. This means that one delegate gives his voting right (and weight) to another delegate for a certain period of time or the duration of a meeting.
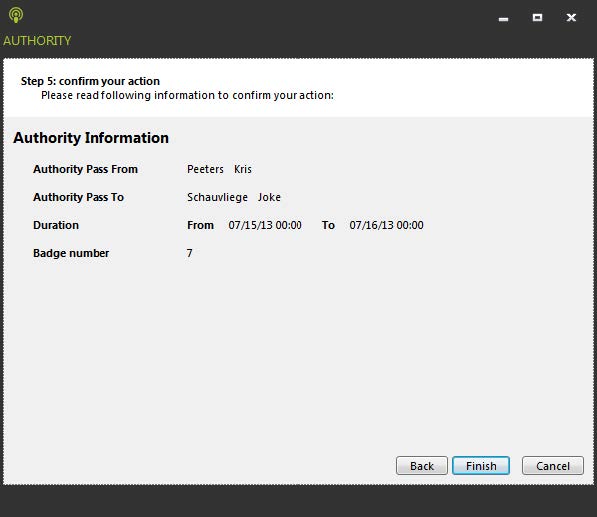
This section describes how to create a voting authority pass. Click Add authority pass/Delete authority passto create an authority pass, a new window opens. There are 5 steps in the creation of an authority pass:
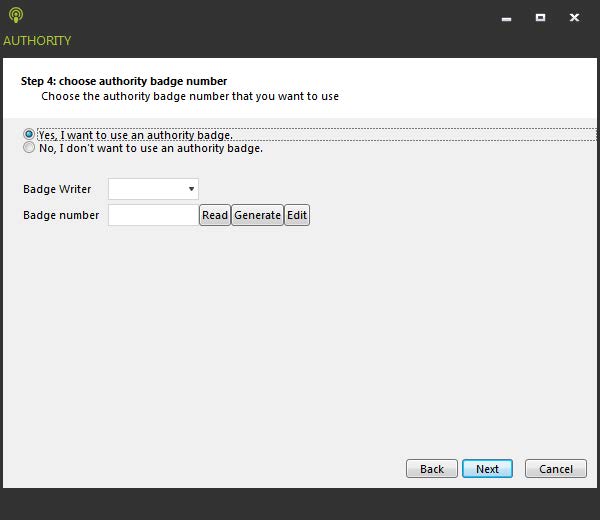
If you select the first option (Yes, I want to use an authority badge), you can choose one of the following actions:
If you select a delegate that has a passed voting authority, you can see the following indications of given and received authority passes in the Delegate Details on the right of the Delegate Management screen:

_600x117.png)
Figure 1-14 How Authority looks like in the delegate details page
After selection of any of the authorities, you can click the Authority Detail button to see more information about the authority pass between delegates. This is shown below:

After selection of any of the authorities, you can click the Delete Voting authority pass which deletes the selected authority pass.
Note the following restrictions when working with authorities:

The CoCon Delegate Management allows expdanding the delegate information with additional attributes. For this the following part in the ribbon is reserved:

Figure 1-15 Edit optional fields button
When you click this button, a new window opens where you can manage the optional fields.
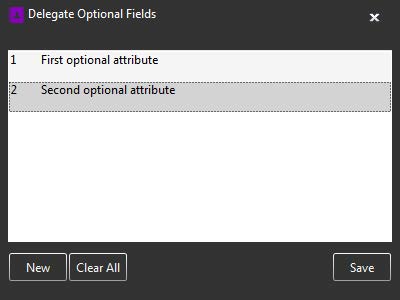
The screenshot shows a scenario in which two optional attributes defined. The following actions are available:
When finished, close this window by clicking the Close icon in the upper right corner. Then the delegate panel looks like this:
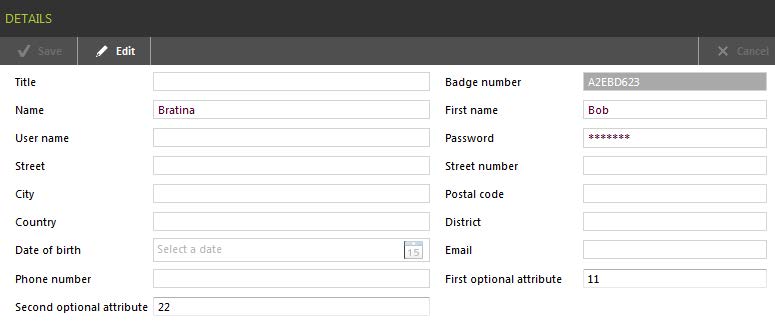
This screenshot shows the two additional fields below all other default fields. Once added, they are treated the same as other delegate data fields.
Groups are sets of delegates with common attribute(s), they have a common name and a color. Groups can be defined with a great level of flexibility: a delegate can be in none, one or many groups. A group can only contain a delegate once.
The Group page consists of three parts:
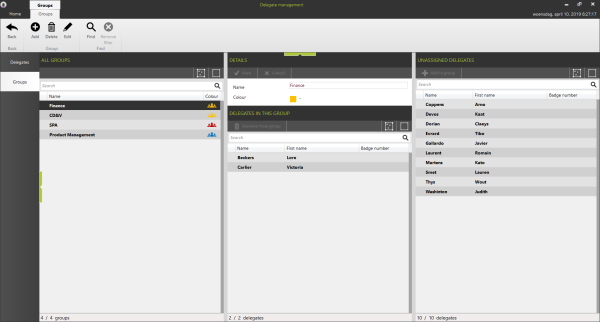
Figure 1-16 How to manage groups on the Meeting Manager
You can add, delete or change by clicking the corresponding buttons in the Groups ribbon.
The following functions are available here:
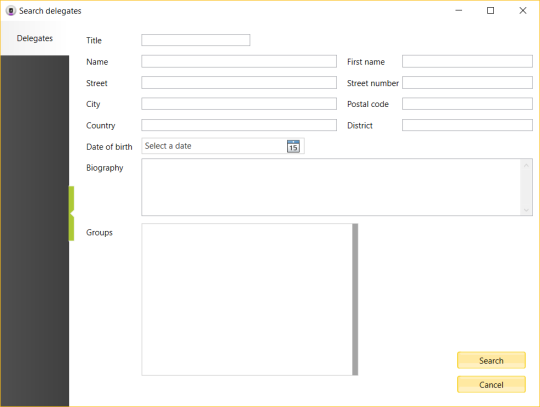
After completing the criteria click Search to close this window and filter the list of groups according to the criteria.
Select a group in the All Groups section, then select a delegate from the Unassigned delegates list and click Add to group on top of this column. Alternatively, you can also select one or more delegates in the list of Unassigned Delegates and drag and drop them to the group of your choice to add them to this group.
After selecting a group in the All groups section, you can remove a delegate from this group by selecting the delegate in the middle column (Delegates in this group), and clicking the button Remove from group on top of this column. Alternatively, you can also select one or more delegates in the list of Delegates In This Group and drag and drop them to list of Unassigned Delegates to delete them.