I would like to install IP-CAM 50 on the ceiling
Prepare for the parts and equipment required during the installation
- Accessories of IP-CAM 50 in the box (metal plates A,B, M3 screw silver x 8, black x 2)
- Screw for locking on ceiling mounted hanger x 4
- Drilling machine, screw driver, ladder
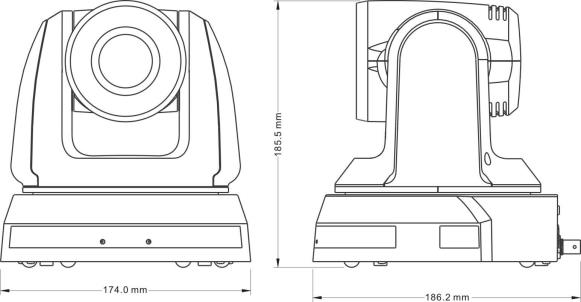
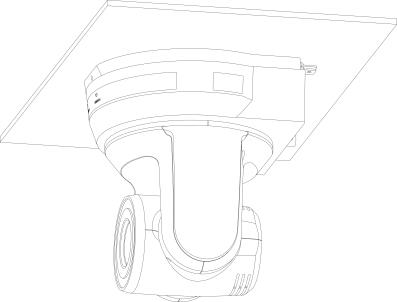
Camera Size
Length x Width x Height: 174 x 186.2 x 185.5 mm
Weight: 1.8 Kg
Max. rotation dimension of camera
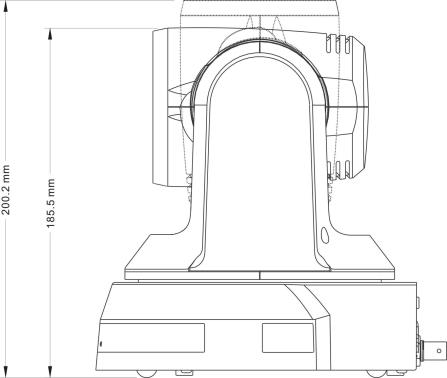
Size Diagram
- Metal plate A - machine side
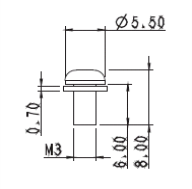 Metal plate A locking screw

Metal plate A - machine side
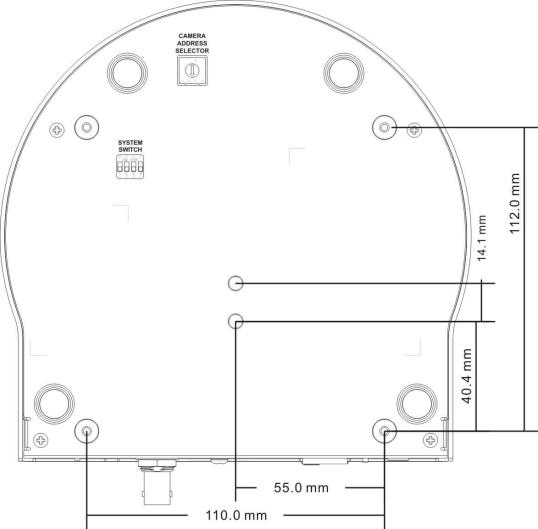
- Metal plate B - ceiling side
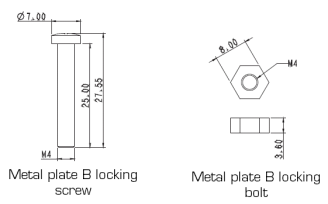
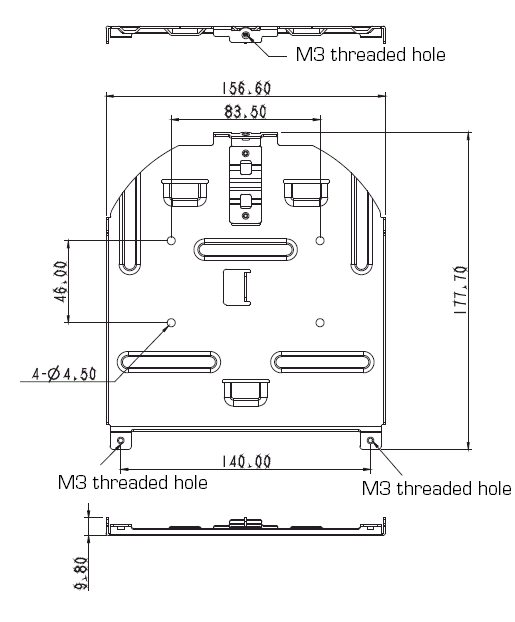
Metal plate B - Ceiling side
- Bottom of machine
Precautions for installation
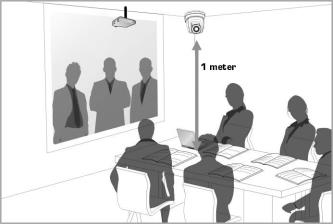
- Before installation, please confirm the orientation of the machine relative to the object to be captured
- It is recommended that the machine should be set at a distance of more than 1 meter away from the object to be captured. Please adjust for a best distance according to the magnification of the lens
- The machine (including metal plates) is weighed at about 2.5 kg. If it is to be installed on the ceiling, please use the hanger that has obtained UL security approval to prevent the machine from falling down.
- Please check whether the camera is installed securely on a regular basis
Installation steps
- Please adjust resolution on DIP switch at first
- Fix the metal plate A on the machine base with 4 M3 silver screws

- Lock the metal plate B on ceiling mounted hanger
Caution:
(1) Please use the hanger that has obtained UL security approval
(2) Please reserve the hole for the connecting wires of the camera
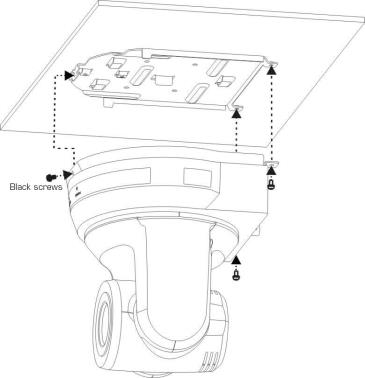
- Combine the metal plate A and the metal plate B
(1) Push the metal plate A up to the ceiling and then to the right to latch the metal plate B
(2) And then secure with 2 M3 silver screws and 1 M3 black screw
How to remove
- Remove the connecting wires from the camera
- Uninstall the camera together with the ceiling, loosen the three screws that fix the metal plates A and B and push to the left to remove the machine
- Then remove the screws on the hanger and the machine