Configure T-Cam software

License and startup

  1. Start T-Cam
  2. You will be asked to provide a license file. This license file is linked to the MAC address of your Ethernet or Wi-Fi port. Please email this information, together with the order number to cocon-license@televic.com
  3. Navigate to the license file which is linked to your Ethernet or Wi-Fi device.
  4. Once the software is opened, you’ll see the following screen:

The user interface is divided into three parts:

General settings - Cameras

Select Settings from the menu, there you find the following screen:

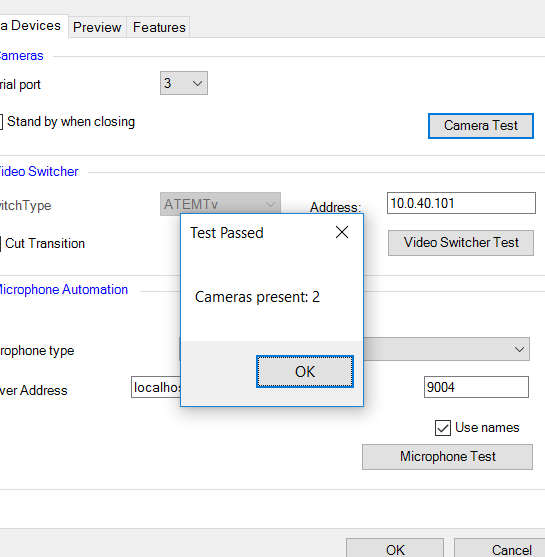
In the Camera Devices tab, tick the Cameras box:

  1. Select the correct serial port and click on “Camera Test”, this will detect the number of cameras attached.

  2. Tick “Stand by when closing” if you want the cameras to enter stand-by when the software quits.
    If the number of cameras is not correct, please verify if all cables are connected correctly, if you license allows that number of cameras and if the dipswitches on the cameras are in matching order.

General settings – Video switcher

Select the Video switcher box

  1. Enter the IP address of the ATEM switcher (specified above), click on Video Switcher Test to check that communication with the switcher works. The detection happens on the network.
    If the switcher is not detected, please verify if the cables are connected correctly, the IP address is correct and if subnets match. Also bear in mind that Atem TV Studio driver 7.2 has to be used (not higher or lower).
  2. Tick “Cut Transition” if you want cameras to switch instantly instead of fade.

See "Full screen and preview video output" on page 1 for preview settings

General settings – Microphone Automation

Select the the Microphone Automation box

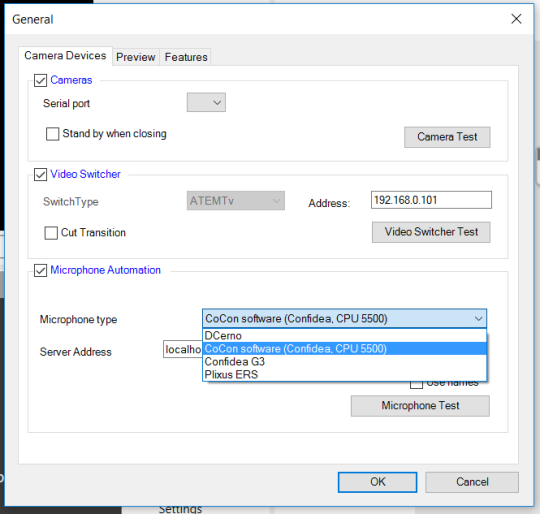
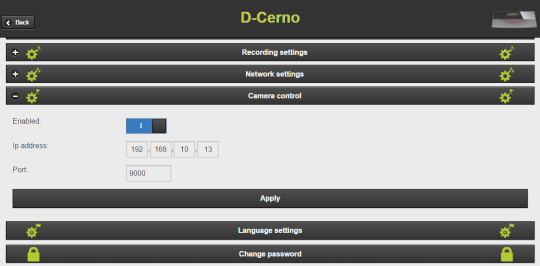
Choose your conference system type, the conference system needs to be on the same network and subnet.
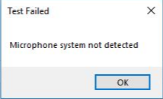
Activate Preview

If you have a capture card:

  1. In the preview tab, select Video Preview.
  2. Select the correct capture card and click on Properties to choose the correct resolution.
  3. Click OK to close the settings page.