To open CoCon, right click on the icon in the task bar and select Settings. You can also type http://localhost/#/settings or replace localhost by the IP address of the computer where CoCon is installed.
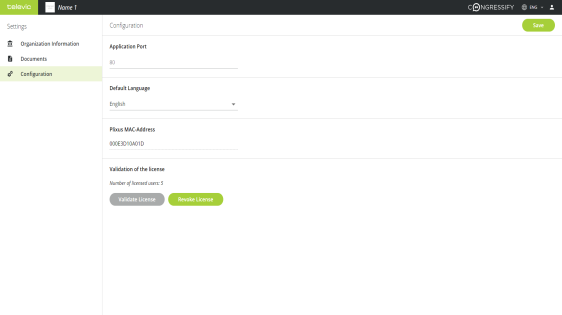
CoCon requires minimal configuration. To use the application you need a license for a specific amount of users, which you have to activate on the computer where you install CoCon. Besides the license, you can also change the application port and the Default language of the application.
Figure 1-6 The Configuration page of the Congressify settings
Before you can start to use CoCon you need to validate your license. For this you need the MAC address, which is available on the Configuration page. The validation process is described in detail in "Manage Congressify licenses" on page 1.
Go to Configuration, under Validation of license you can see Number of licensed users. This is the amount of users that can login to CoCon simultaneously.
In cases where the application port is blocked, there is an option to change the port used by CoCon. To change the application port go to Configuration and change the number under Application Port. Click Save to confirm the changes.
In CoCon you can personalize the header by adding your company name and logo.
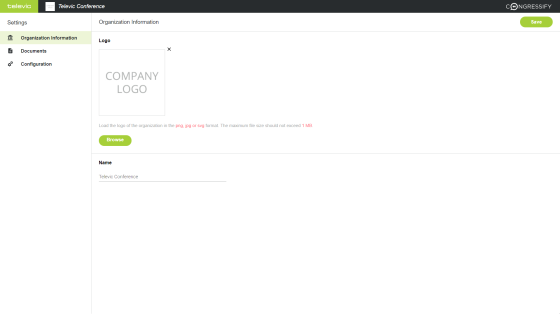
Figure 1-7 How to manage the Organization settings in CoCon
Add the name of your organization to display it in the header of CoCon. Go to Organization Information and type in the name in the Name field. Click Save to confirm the changes.
You can add a company logo to display it next to the company name in the CoCon header. Click Browse to select the image you want to display. Click Save to confirm the change.
In CoCon you can upload different documents which will then be available to the participants in the meeting using the CoCon application. There are two options to add documents:
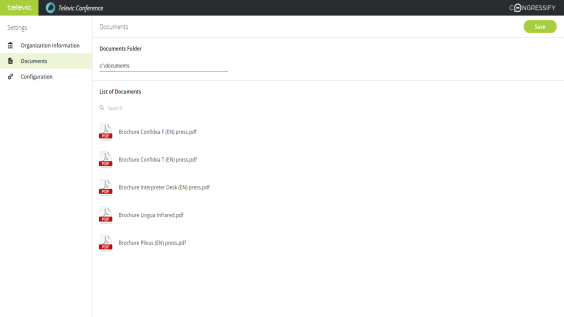
Figure 1-8 How to add documents to CoCon
Go to the Documents tab of the CoCon settings. Under Documents Folder type in the address of the folder where you will put all documents that are relevant for the meeting. Click Save to confirm the change.
Currently it is only possible to upload PDF documents in CoCon.
To see all documents that are available in CoCon go to Documents in the CoCon settings. Under List of Documents you can find all documents that where added in the CoCon Meeting Manager together with the documents that are available in the folder specified under Documents Folder.
You can use the Search functionality to look for specific documents.